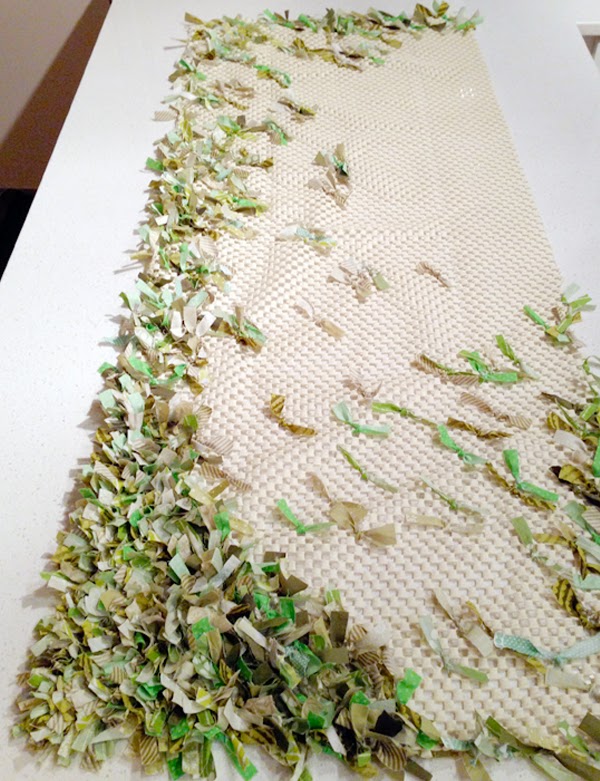
This was a project that in my mind seemed so simple and then I started in... "what have I done!?!"
Sometimes I think everything is like working on the computer, command Z this and command C, command V that.... making projects so simple when the reality is really a monotonous time taker. THIS was a monotonous time taker.
I did about half of it, I don't even know if you could call it half. It was probably about 18 nights of tying knots, with hand cramps and back aches. It was still so thin and bare looking. Then my husband's grandmother, BLESS HER, was needing some projects and she saved my bacon.
GrandmaGreat completed enough in one week to hit the goal: just enough to make it look like grass. It's not completely full. If you were to turn it over, you'd see lots of spaces that could use filling. She and I both agreed that this is something you could do forever and never be done. But we were both satisfied that it looked like grass and that is all we needed. It is for the playroom and it won't have any foot traffic, it's just for show.
If you'd like to make one, I suggest something small for your sanity sake, unless you too have a GrandmaGreat that is willing to save your hide.
SUPPLIES
Variety of Green Fabrics (I used fat quarters*)
Scissors
Non-Slip Rug (cut to the desired size)
PROCESS
1. Lay out one fat quarter of fabric, one piece at a time, upside down. Fold it in half, and then fold it in half again.
2. Cut the folds so that you have four equal strips.
3. Cut 1/2" strips.
4. Repeat this process for each of your green fat quarter fabrics.
* If you buy more than fat quarters, just do this and eyeball it. The finished strips are about 1/2" x 5".
5. Cut your Non-Slip Rug Pad to the desired size.
6. Begin tying knots*, one strip per opening.
*Because my rug was not in a high traffic area and I'm not planning on ever washing it, I just tied it ONCE, I didn't tie it twice to make a knot.
7. Try to tie all of them in the same direction. I'm not sure why, maybe this is a bit of OCD talking, but it's nice to turn it over and have them all going the same direction ;)
This is what mine looked like after a few nights of working. In my next post... The playroom dress up area has the finished rag rug.


No comments:
Post a Comment