Once Upon a Time... I had a lovely job at a small studio called Axiom. I met my husband there. I met the best boss in the world there. I met lots of fabulously talented people there. I made wonderful friends there. We were like a little family.
When one of them started her own company, I was excited to help in any way possible. She needed a logo, she needed packaging.
Those things, I can do.
Little J Headbands are so versatile. They work with both short and long hair. The scarf is quite cozy, and there's no need to take it off after you take off your coat... it becomes part of your outfit. Super!
Packaged in a clear box with a blind embossed kraft lid and. Logo and directions in black. The boxes stack on the shelf and have been selling like hot little cakes! Yay for LittleJ!!!
30 April 2015
21 April 2015
PARTY IN THE GARDEN
This is the first time we haven't had a birthday party at our house. So far, we have had 11 parties between our two kids with themes like Cupcakes, Japanese Girl, Dutch Tulips, Polka Dots, Fairies, Farmer's Market, Cinderella, Pastel My Little Pony, aaaaand Frozen. I'm kind of running out of wowza. I think we peaked with that Frozen party last year... no pun.
I'm actually trying to tone it down a bit. So we booked Red Butte Gardens. They entertain the kids with a story, craft and games. They also do the clean up, which is mighty nice.
So on the party planning end, all I did was prep a snack, cupcakes, a few decorations and a party favor. In all honesty, any normal person would have just paid the fee for the event and be done. I'm taking some baby steps with this toning it down thing.
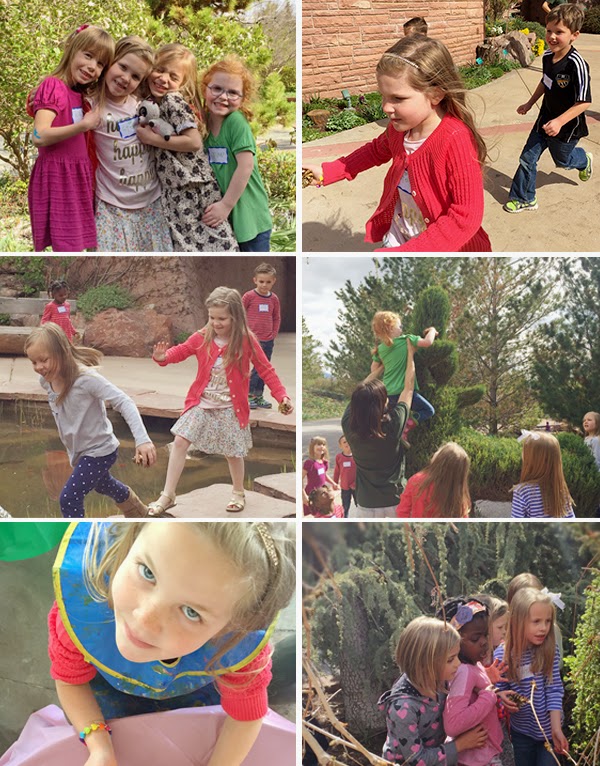
The following images show the party favor, decorations, cupcakes and twelve really happy kids. You can also check out my Party Plans board on Pinterest.
PARTY FAVOR
Includes a garden shovel, Easter grass and candies, strawberry marshmallows, handmade watermelon notebooks, pencil, bugs and sugar stick. I made the clothes pins with washi tape for each kid. Many items purchased at Target's Dollar Spot or on sale after Easter had passed.
SNACK BASKET
I used baskets (luckily on sale at the Dollar Tree, 2 for 1:), lined with a napkin and then each had an Izzy's soda can, Angie's Boom Chicka Pop, napkin with straw, granola bar wrapped in kraft paper and an applesauce squeeze.
DECORATIONS
Because our party was in a garden we focused on watermelons and strawberries, using lots of pinks and greens. Balloons with paper 7s tied to the strings, white flowers in milk glass vases and green tea tins, colored table cloths, a handmade banner on skewers stuck in potted plants, and a "seven" cupcake topper skewer. I made the seven topper with a wood seven, covered it with washi tape and glittered the edges.
CUPCAKES
Chocolate with pale pink frosting and a watermelon sour topper.
14 April 2015
DIY NECKLACES
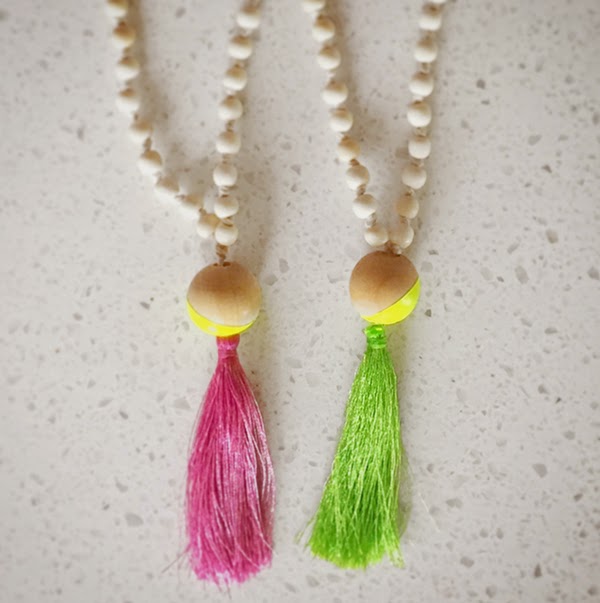
I made a shorter version of the same necklace as the last post for my girls easter outfits. *Side note, after they wore them for 10 minutes and proceeded to attack each other as they do, I noticed the necklaces were starting to fray at the tussle's knot. So I tugged the strands down again and superglued the top of the tassel. This process is called NinaProofing. I should have done it from the get go.
P.S. The dresses are made by Nicole Paul of Hum Stitchery and the sweaters are from Zara.
03 April 2015
EASY SPRING NECKLACES
Here's a quickie for the Easter Baskets. I made these for a birthday party favor last weekend, but after my daughters saw these colorful tassels ... I had to make one for them too.
SUPPLIES
Natural Hemp Cord
Elmer's Glue - I use this to stiffen the ends for easier threading
Small Natural Wood Beads
16-20mm Wood Bead
Florescent Yellow Rubberized 8 mm Beads
Florescent Yellow Enamel Paint
Clear Gloss Spray Paint
Masking Tape
Fabric Scissors
Fraycheck or Superglue
Brush
Florescent Yellow Polyester Thread
PROCESS
1. Mask off the larger wood bead in the way you want to paint it. You can slant or half it. You can paint the whole bead or leave it natural. I like mine slanted or half painted.
2. Paint several coats and let dry in between. I like to paint with the bead on a chopstick... stick the handle end into a piece of Styrofoam to dry. When you're happy with the amount of color, you can spray it with a clear gloss spray paint.
3. During dry time, prep the necklace and make the tassel. First cut a piece of hemp cord about 80" long. This may seem long but if you want a long necklace that slips over head you'll want plenty for knotting. It's better to have too much than too little.
4. Next start on the tassel by winding yellow thread around a book (6" wide or so) about 75-100 times. Slide the thread off of the book, carefully gather it at its half point and wrap it around the hemp cord half way point (40"). Take another piece of the same yellow thread, wind it around and knot it. I like to wind it again and knot it again for extra security. I also dab a little fray check or super glue on the knot just for good measure. Secure! Then cu the loops and trim the tassel.
5. Dab a bit of Elmer's glue on the end pieces of the hemp cord. I like to twist it between my fingers to make each end stiff and straight. * FYI, if these aren't good threading ends, it makes it tough to get through the bead holes easily and this project that once seemed simple becomes a real drag. So these ends need to be good and stiff and tight for threading. This cord doesn't go through needles easily, and many needles are too large for these smaller beads. I've experimented and the glue ends has proven to be the easiest method.
6. Once the wood bead is dry you can thread it onto the necklace by taking both ends together and putting it through the wood bead hole. I like the yellow half to be closer to the yellow tassel. Take the bead all the way down to the tassel top and superglue it into place, tightly so that you don't see any hemp cord. I glue it so that the bead doesn't slip through all the way.
7. Knot at the top of the wood bead and start adding beads to each strand to your desired point. I had some medium sized beads (about 8-10 mm) that I used first, you can put two or three of these first, then the smaller. For little kids, it's cute to skip these middle sized beads. After each bead I knot it tightly into place before adding another bead. I put the same number of beads on each strand and stop at about the collar bone point. I like seeing a bit of string at the top but you can keep adding beads all the way around to the top if you'd like.
That's it, you can make this as short or long as you'd like. For women, these were about 10" o beads and then some string. For kids I did less.
Happy Easter! xoxo